
What is Flutter?
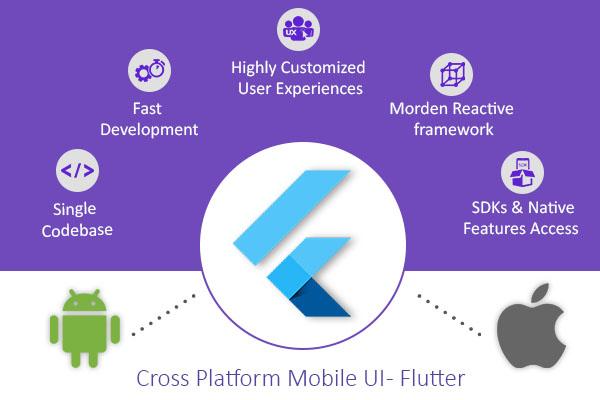
Flutter is Google’s mobile UI framework for crafting high-quality native interfaces on iOS and Android in record time. Flutter works with existing code, is used by developers and organizations around the world, and is free and open source.
Why to use Flutter?
Be Highly Productive
-Develop Android and iOS app using single codebase.
-Do more with less code, even on a single OS, with a modern, expressive language and a declarative approach.
Fast Development
-Experiment by changing code and reloading as your app runs (with hot reload).
-Fix crashes and continue debugging from where the app left off.
Highly Customized User Experiences
-Flutter has an advantage of a rich set of Material Design and Cupertino (iOS-flavor) widgets built using Flutter’s own framework.
-Realize custom, beautiful, brand-driven designs, without the limitations of OEM widget sets.
Morden, Reactive Framework
-Flutter can easily create UI with modern reactive framework and rich set of platform, layout and widgets. Solve your tough UI challenges with powerful and flexible APIs for 2D, animation, gestures, effects, and more.
SDK’s and Native Features Access
-Using Flutter, you can also use the native code 3rd party Sdk, APIs. Flutter lets you reuse your existing Java, Swift, and ObjC code, and access native features and SDKs on iOS and Android.
Install Flutter on Linux
Install and run the Flutter you must meet the minimum requirement.
-64-bits Linux operating System
-600 MB minimum disk space
-Flutter depends on these command-line tools being available in your environment. (bash, mkdir, rm, git, curl, unzip, which)
Step 1 : Download the Flutter SDK
You can clone the beta branch of the repository, then add the Flutter tool in your path.
$ git clone -b beta https://github.com/flutter/flutter.git
Step 2: Set Flutter path
You can set Flutter path temporarily as well as permanently. Below command is used to set the temporary path, for the current terminal window.
$ export PATH= pwd /flutter/bin:$PATH
To add Flutter permanently to your path, follow the below steps:
export PATH=[PATH_TO_FLUTTER_GIT_DIRECTORY]/flutter/bin:$PATH
Run source $HOME/.bash_profile to refresh the current window.
Verify that the flutter/bin directory is now in your PATH by running:
$ echo $PATH
Step 3: Check Flutter Configuration
$ flutter doctor
The above command is used to check for any dependencies need to the complete setup. When you run the doctor command for the first time, it will download its own dependency and compile itself. When you run the command, it will display the following output in your cmd screen.
[-] Android toolchain – develop for Android devices
• Android SDK at /Users/obiwan/Library/Android/sdk
✗ Android SDK is missing command line tools; download from https://goo.gl/XxQghQ
• Try re-installing or updating your Android SDK,
visit https://flutter.io/setup/#android-setup for detailed instructions.
If You have already installed the android studio. Then just set the ANDROID_HOME environment variable to android sdk path.
Step 3 Editor Setup :
Now we will setup the editor. With the Flutter command-line tool, you can use any editor to develop Flutter application.
Type $ flutter help at a prompt to view the available tools.
You can build apps with Flutter using any text editor combined with your command-line tools.
Following steps are used to configure Flutter plugin to android studio.
We required Android Studio version 3.0 or later.
Install the Flutter and Dart Plugins
Flutter is supported by two plugins:
-The Flutter plugin powers Flutter developer workflows (running, debugging, hot reload, etc.).
-The Dart plugin offers code analysis (code validation as you type, code completion, etc.).
Steps to configure Flutter editor to android studio :
- Start Android Studio.
- Open plugin preferences (Preferences>Plugins on macOS, File>Settings>Plugins on Windows & Linux).
- Select Browse repositories…, select the Flutter plug-in and click install.
- Click Yes when prompted to install the Dart plugin.
- Click Restart when prompted.
Step 4: Set up your Android device
To run and test your Flutter app on an Android device, you’ll need an Android device running Android 4.1 (API level 16) or higher. By default, Flutter uses the version of the Android SDK where your adb tool is based.
Connect your device using the USB cable and turn on USB Debugging option. Run the command flutter devices to display the connected device list in terminal. Thereby, to run your app type flutter run command.
Taken reference from:
To know more about Flutter or to build Android Mobile app; contact SimBeez
